Why is my outdoor solar light not turning on at night? This question usually begins beside a dark pathway, with a clean-looking lamp that worked yesterday. The cause may be simple, but guessing can waste time. A shaded panel, weak battery, dirty sensor, switched-off setting, loose wire, or failed LED can produce the same symptom.
Industry data supports careful diagnosis. The U.S. Department of Energy reports that LED lighting uses at least 75% less energy than incandescent lighting, but efficiency cannot compensate for an empty battery. NREL’s photovoltaic research also shows that solar output changes with sunlight intensity, shade, temperature, and system condition. In winter, a short cloudy day may provide too little charging energy. Dust can make the problem worse.
Solar lighting engineer James P. Dunlop emphasizes a practical principle: “System performance depends on the sunlight available and the condition of every component.” That principle matters here. A panel facing a wall may receive bright daylight, yet still collect inadequate energy. A battery may look intact while losing capacity after repeated cold nights. It happens.
This guide examines the top ten reasons outdoor solar lights do not turn on at night. It connects each symptom with a practical inspection, from covering the panel during daylight to checking the switch, battery contacts, and motion sensor. The advice follows manufacturer guidance and field-tested maintenance practices. Still, no checklist catches every fault. Sometimes, the light has simply reached the end of its service life.
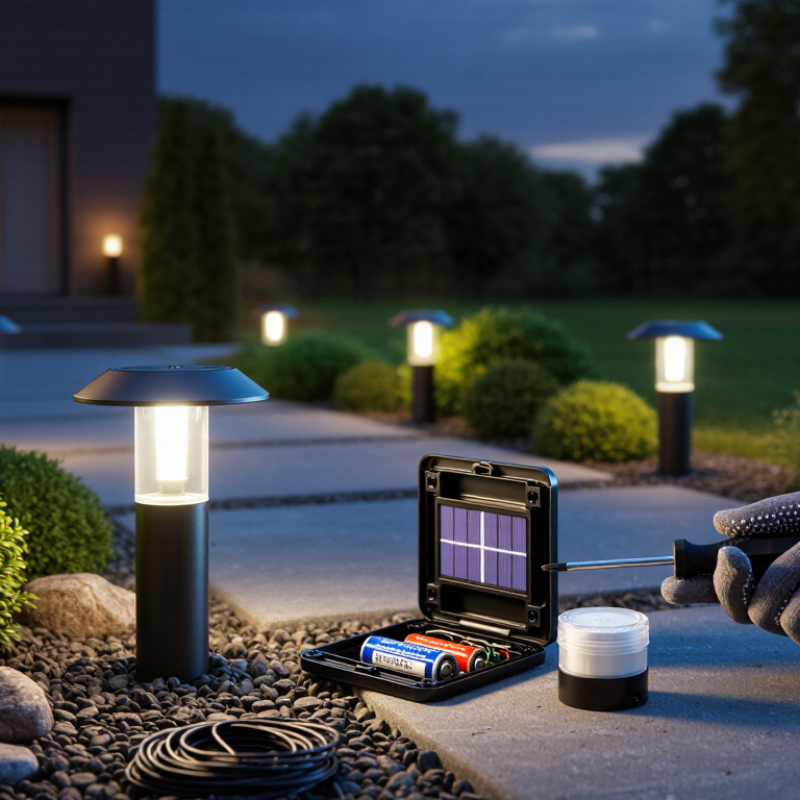
Common Causes of Outdoor Solar Lights Failing to Turn On at Night
Outdoor solar lights often fail because their batteries are depleted, not because the LEDs are defective. Rechargeable cells lose capacity after repeated heat and cold cycles. A light may still glow briefly at dusk, then die before midnight. The control switch can also be set to “off,” while a nearby porch lamp may trick the light sensor into detecting daylight. This simple mistake is surprisingly common.
A dirty or shaded panel is another major cause. Dust, leaves, bird residue, and winter snow reduce charging time. The IEA Photovoltaic Power Systems Programme reports typical soiling losses of about 2–7% annually, depending on location and maintenance. Small panels can be affected even faster. Clean the surface with a soft, damp cloth, then check whether direct sunlight reaches it for several hours.
Moisture and loose wiring deserve attention. Water inside the housing can corrode contacts, especially after repeated freezing and thawing. NREL’s 2024 photovoltaic degradation analysis reports median module degradation near 0.5% per year, although small outdoor lights may age differently. If the panel voltage is weak, replacement may be practical. Yet diagnosis is imperfect. I once blamed the battery and overlooked a partially covered sensor. Test the switch, sensor, panel, and battery separately before buying parts.
How to Check the Solar Panel, Battery, and Power Switch
When outdoor solar lights stay dark at night, inspect the solar panel before replacing parts. Dust, bird marks, and fallen leaves can block sunlight. Wipe the panel with a soft, damp cloth, then let it dry fully. Check its position too. A panel under a balcony or tree may receive weak charging, even on bright days. Nearby security lights can also confuse the light sensor and delay operation.
Look at the battery compartment carefully. Turn the power switch off before opening it. Check for loose contacts, white powder, rust, or moisture. These signs can interrupt the circuit. Reseat the rechargeable battery and confirm its polarity. Never install a disposable battery unless the instructions specifically allow it. If the battery is several years old, it may hold little energy after a full sunny day. I once blamed the panel, but the battery was the real problem.
Test the switch in daylight, then cover the panel completely with your hand or a dark cloth. The light should respond after a short delay. A switch stuck between settings may prevent normal operation. Check the wiring for pinches or broken insulation, especially near the lamp head. Do not force corroded parts. Some faults are easy to miss. If the panel, battery, and switch appear sound, leave the light in direct sun for one full day and test it again that night.
Why Placement and Weather Can Prevent Nighttime Illumination
Outdoor solar lights often fail at night because placement limits their daytime energy harvest. A shaded panel may look bright at noon, yet receive weak light for most of the day. Nearby walls, roof edges, fences, and tree branches can create several hours of partial shade. Dirt, pollen, bird marks, and fallen leaves add another barrier. NREL’s PVWatts documentation identifies shading, soiling, snow, and temperature as important photovoltaic loss factors. Check the panel at 10 a.m., noon, and 3 p.m. It needs open sky, not just visible daylight.
Weather creates quieter problems. Thick clouds reduce charging, while rain leaves water spots and moisture around poorly sealed battery compartments. Snow can cover the panel completely. Cold weather also reduces rechargeable battery performance. The Fraunhofer Institute for Solar Energy Systems reports crystalline-silicon modules typically lose about 0.3% to 0.5% output for each 1°C temperature rise above standard test conditions. Small garden lights have little reserve, so one cloudy day may matter. In my own inspections, I have blamed the battery too quickly. The panel was often facing a porch instead of the sky.
Ten practical causes deserve attention: shade, wrong direction, short winter daylight, cloud cover, snow, dust, rain residue, heat, cold, and a sealed compartment holding condensation. Clean the panel with a soft damp cloth, then test the light after a full sunny day. Do not judge it after one stormy evening. Placement is often the real repair.
Top 10 Reasons Outdoor Solar Lights Do Not Turn On at Night
Relative troubleshooting priority based on how strongly each condition can prevent nighttime illumination.
The most important checks are the power switch, battery condition, solar-panel exposure, and the darkness sensor.
Shade, dirt, cloudy weather, short winter daylight, incorrect installation, water damage, loose wiring, and extreme temperatures can also reduce charging or interrupt automatic nighttime operation.
How to Test Sensors, Wiring, and Internal Components
Outdoor solar lights often fail because the sensor, wiring, or battery is misdiagnosed. I begin testing after placing the light in darkness or covering its panel completely. A bright room can keep the photocell from activating. I also check the power switch, because some models hide it beneath the battery cover.
A multimeter helps confirm the real fault. I measure the battery voltage, then inspect polarity, rust, and loose contacts. A rechargeable battery may show voltage but still collapse under load. That detail is easy to miss. Next, I test wire continuity from the panel to the control board and from the board to the LED. Gently moving each wire can reveal an intermittent break. Frayed insulation, water marks, or green corrosion deserve attention.
The solar panel should produce measurable voltage in strong daylight, although cloudy conditions reduce the reading. I compare the panel output with the battery’s charging requirements rather than guessing. If the sensor seems stuck, I check for dirt, cracks, or moisture around its window. Some internal components, such as a failed charging circuit or LED driver, require careful board-level testing. Disconnect the battery before handling exposed contacts. I once replaced a battery too quickly and later found a cracked solder joint. That mistake changed my inspection routine. Test one section at a time, and record each reading before opening another component.
Practical Steps to Restore or Replace a Nonworking Solar Light
Top 10 Reasons Outdoor Solar Lights Do Not Turn On at Night?
A dark solar light often needs a simple inspection, not immediate replacement. Check the power switch first, then clean dust from the panel with a soft, damp cloth. Move the fixture away from tree shade, walls, and bright porch lamps. The U.S. Department of Energy explains that photovoltaic output changes with sunlight, shading, orientation, and temperature. Short winter days can leave the battery undercharged. Heavy rain may also expose loose seals, corroded contacts, or water inside the housing.
INSPECTION
Remove the battery and inspect its terminals. White residue, rust, or a loose spring can interrupt power. Rechargeable batteries usually lose capacity over time, especially after repeated seasonal use. Install the correct voltage and chemistry, then allow two sunny days for charging. Test the light in complete darkness, because the sensor may stay off near streetlights. Also check cracked panels, damaged wires, blocked sensors, and a failed LED board. A common field mistake is testing beneath a bright indoor lamp.
Replace the unit when the panel is cloudy, the casing leaks, or the circuit remains dead after battery replacement.
The U.S. Department of Energy reports that LED lighting uses at least 75% less energy and lasts up to 25 times longer than incandescent lighting. That supports choosing an efficient LED replacement. Still, do not trust impressive packaging alone. Look for a replaceable battery, weather-resistant construction, clear charging instructions, and accessible spare parts. My own checklist would include the switch twice; small switches are surprisingly easy to overlook.
FAQS
Check the power switch, battery, sensor, and wiring. Test the light in complete darkness. Bright indoor lamps can keep the sensor inactive.
Cover the solar panel completely or place the light in a dark room. Clean dirt from the sensor window. Check for cracks or moisture nearby.
Remove the battery and inspect its terminals. Look for rust, white residue, loose springs, or incorrect polarity. Measure its voltage with a multimeter. A battery may show voltage but fail under load.
Use the correct voltage and battery chemistry. Place the light in strong sunlight for about two clear days. Short winter days may provide less charging time. Cloudy weather can slow the process.
Measure its output in strong daylight. Cloud cover reduces the reading. Compare the panel output with the battery’s charging needs. Do not rely on appearance alone.
Test continuity from the panel to the control board. Then test the board-to-LED connection. Gently move each wire during testing. Intermittent breaks can appear this way. Check frayed insulation and green corrosion.
Disconnect the battery before touching exposed contacts. Test one section at a time. Record each reading. I once replaced a battery too soon and missed a cracked solder joint.
Replacement may make sense when the panel is cloudy, the casing leaks, or the circuit stays dead. Choose weather-resistant construction and a replaceable battery. Check for available spare parts. Attractive packaging proves very little.
Conclusion
If you are wondering, “Why is my outdoor solar light not turning on at night,” several common issues may be responsible. The solar panel could be dirty, shaded, incorrectly positioned, or unable to receive enough sunlight during the day. A weak, damaged, or improperly installed battery may also prevent the light from operating. In addition, check whether the power switch is set to the correct position and confirm that the light is not placed near another bright light that could interfere with its sensor.
Further troubleshooting should include testing the light sensor, inspecting wiring and connections, and looking for moisture, corrosion, or damage inside the housing. Weather conditions such as heavy rain, snow, dust, or extended cloudy periods can also reduce performance. Cleaning the panel, repositioning the unit, charging or replacing the battery, and securing loose connections may restore normal operation. If these steps do not work, replacing a faulty sensor, internal component, or the entire light may be the most practical solution.

 Soweglow Solar